Using an IBC Container to build Wicking Beds

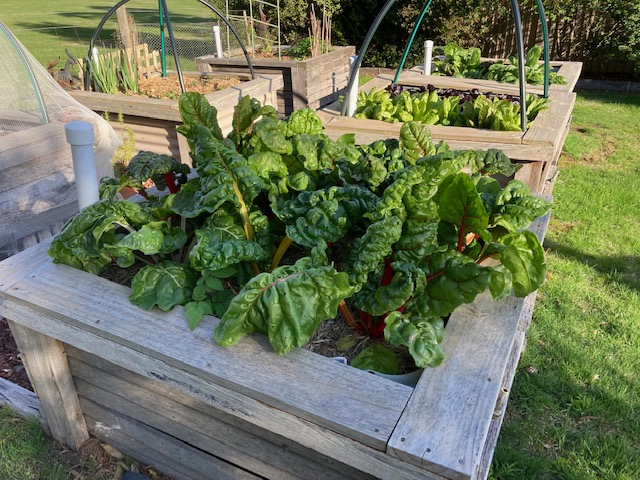
Words and images by Mark Ridgeway of Pipers Creek Landcare – Mark established these beds in 2018 and has been enjoying fresh produce from them ever since!

ABC’s Gardening Australia have a great segment on this – the method Mark describes below is very similar with the exception of the location of the outlet pipe.

You will need:
  • One food-grade IBC Container – food grade or know what was in it
  • Two inlet pipes  (Drainage/waste grey pipe) – 50mm X 1m
  • Two caps – slip (pressure – white) – 50mm
  • Tow bends (drainage/waste) – 50mm 85º
  • Two Poly elbows (black & threaded) 15mm
  • Two tank connectors – black poly, threaded with back nut 15mm
  • Two poly pipes (black and threaded) – 150mm X 15mm
  • Gaffer tape, pipe glue and teflon tape
  • Two lengths of agricultural pipe – 2m X 50mm
  • Geofabric/geotextile cloth – 1m X 10m ( you can also use doubled over weed mat)
  • Good quality friable soil – approx. 0.5 metre (standard trailer load) – should do both beds
  • One-inch scoria – approx. 0.5 metre (standard trailer load) – should do both beds
  • Some mulch – pea straw or equivalent – sufficient to cover top of bed
  • Some form of timber pallet or base; alternatively sufficient timber to build a base for each wicking bed or sufficient gravel of scoria to build a level and supportive base. Note that only the wicking bed created from the top half of the IBC tank strictly needs a base, however, you may desire to raise the height of the beds overall.
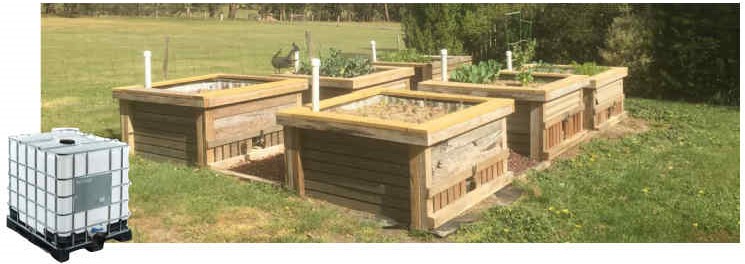
  • Optional – sufficient suitable material to build decorative surrounds for the wicking beds. The surrounds can also serve to limit light availability to the slightly transparent plastic tank, thus limiting algal growth in the water reservoir.
Preparation:
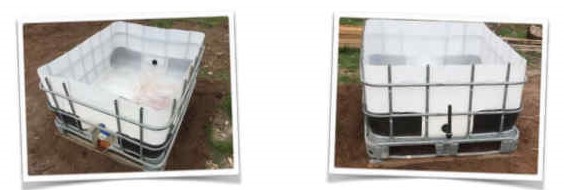
  • Unbolt the aluminium straps at top to release the plastic container from the frame.
  • Use an angle grinder to cut in half – both the frame and plastic container (I found it was easier to use the angle grinder on the metal and then a jigsaw on the plastic). Give the two halves a good wash out.
  • Check the two halves for water tightness (quarter-fill with water and leave overnight). You will probably need to silicon the seal around the circular lid in the top half of the tank and may need to seal off the outlet tap on the bottom half.
  • Whilst waiting for the silicon to dry, attach the two 85º bends to the ends of the two one-metre inlet pipes using the pipe glue to fix them in place. Then attach a two-metre length of agricultural pipe to the exposed end of each bend and seal in place with gaffer tape.
  • Once you are satisfied that the tanks are water tight (test and test again!) – use a hole saw to drill the outlet pipe hole – as close to the base of the tank as practical (don’t go too close to the bottom – the large washer on the tank connector goes inside the tank and it needs to fit! Some tanks have a thickening of the plastic on the inside close to the bottom that can be deceptive and missed if you are only looking and checking from the outside of the tank).
  • Insert and attach the tank connectors – use teflon tape as appropriate to seal the connection. Don’t attach the elbows or poly pipe yet as it is a good idea to do this once the tank is in its frame and in its final location.

Site Preparation
  • Ensure that your chosen site is suitable for growing vegetables – exposed, sunny and within range of a tap.
  • The site should be weed free and it must be level. I laid down plastic to discourage weeds growing up between the beds and put down additional scoria to create pathways.
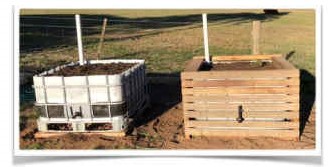
  • Set up the bases for your wicking beds – whether they are pallets, wooden frames or gravel/scoria. Note that one of your beds will already have its own stable metal frame but the other bed will need some degree of support. As this is the old top of the IBC tank, its base will have multiple levels – I custom made a pallet to support it but strategic use of gravel/scoria and/or placement of timber can achieve the same outcome. You may wish to raise the beds further off the ground to improve access – this is up to you.
  • Transfer the plastic wicking beds and their frames to the site. Position the beds on the site. Ensure that they are level, the drainage points the right way and there is sufficient space between beds for access (remembering that you will be working, gardening, moving stuff in and out, digging etc.)
  • Once you are happy with the location of your beds, attach the remaining elbow and poly pipe to the outlet component- using teflon tape again where necessary (once the scoria has been added, you will need to cut the poly pipe to the required length). Again, half fill the tanks with water and leave to test for leaks in the system.
  • The outlets for our wicking beds have been designed so that you can drain the water reservoir by turning the pipe on its side. This enables the beds to be drained in winter so as not to become waterlogged and to be flushed out when necessary (it is very easy to over fertilise a wicking bed).
Creating the Wicking Beds
  • Set up your inlet pipes along with the agricultural pipe attachments into the wicking beds.You may need a couple of bricks to temporarily hold everything in place until you add the scoria.
  • Place about 200mm of scoria into each of the beds. You need to keep between 200 and 300mm of room above the scoria line in the top half of the bed for the soil. The soil shouldn’t be any deeper than 300mm as the wicking action starts to fail at that point.
  • Note that some wicking bed designers are now advising that the scoria/cloth layer can be overkill and the beds continue to work just fine by filling them with soil. If you were to do this you would need to put a protective sock over the agricultural pipe to stop it filling with soil.You would also need to attach a short, socked piece of agricultural pipe to your outlet drain to keep the soil from washing out of it. Some people take this latter step anyway to ensure the pipe doesn’t become blocked – however I haven’t had a blockage problem using the one-inch scoria.
  • At this point you can shorten the upright drainage poly pipes to the required height at the top of the scoria layer. Use a hack saw to carefully shorten the pipes. (I wrap a piece of masking tape around the pipe at the required height and then mark on the tape using a spirit level against the top of the scoria layer. The masking tape also help you to keep the cut straight with the hacksaw).
  • Now add a layer of the geotextile fabric across the top of the scoria. You can also use a piece of doubled over weed mat as a substitute.
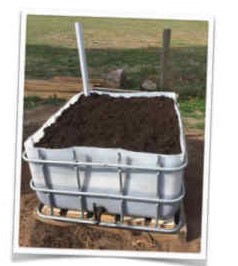
  • Now add your soil. It is important that the soil is good quality,light, and friable. A dense soil can become water-logged and start to pong (apparently a common problem with wicking beds) due to anaerobic activity – particularly if it is well fertilised.
  • It is also a good idea at this point to shorten your inlet pipes down to an appropriate height. Again use your hacksaw assisted by some masking tape around the desired section of the pipes. Use the Slip Caps to seal off the top of the pipes and keep it clear of unnecessary critters – mosquitos, animals etc.
  • At this point you can start dressing up the external part of the beds. I used a mixer of recycled materials including tin and timber.
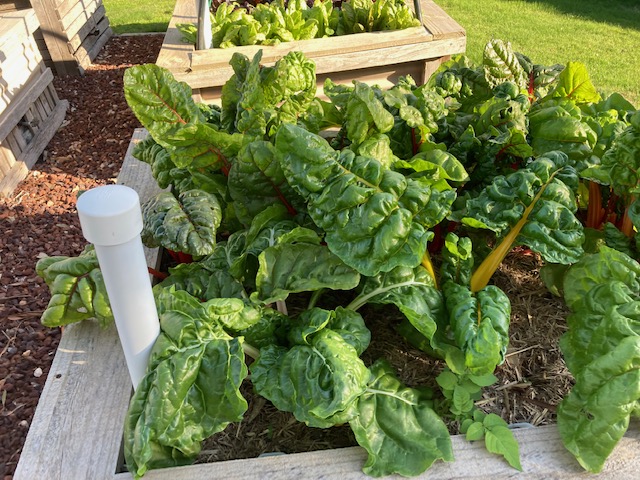
  • Once you are happy with your beds, plant them out and mulch with the pea straw and whatever you have chosen to use. Fill the beds with sufficient water to overflow the outlet pipe. Give them a day or two to start wicking properly and remember that you will still have to water new seedlings in until their roots establish.

Friends of Grasslands 2023 Small Grassy Ecosystem Grants – Applications Invited.

Friends of Grasslands (FOG) is again offering a small number of grants of up to $1500 each for projects that promote its objectives and priorities in relation to the understanding, conservation, and management of native grassy ecosystems. Any individual or organisation can apply.

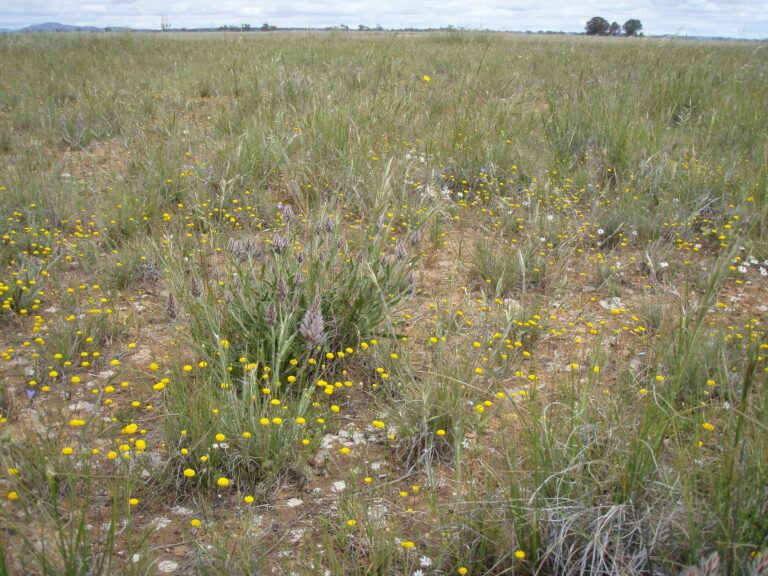
Very high quality Northern Plains Grasslands in Spring, note the inter-tussock spaces and diversity of flowering herbs (Photo: Nathan Wong).

A grant may be used to solely fund a small project or to partially contribute to a larger project. The nature of an eligible project can involve one or more of the following: education, research, surveys, monitoring, citizen science, on-ground work or training, publications (physical or electronic), advocacy or policy development, publicity and awareness raising, collaboration and networking, Indigenous engagement, or other forms of communication (spoken or written word, visual, other sensory).

Further information and the 2023 Application Form are available from our Grants webpage at https://www.fog.org.au/supportedprojects.htm.

Closing date for applications is Friday 21 April 2023. We aim to notifyapplicants of the outcomes of their applications within six to eight weeks of the closing date. For enquiries and further information please contact us at supportedprojects@fog.org.au.

For an overview of who we are, how we operate, and the scope of our activities a good starting point is our most recent annual report at http://www.fog.org.au/AGMs.htm.

NatureMapr – Australia wide citizen science platform

You or your colleagues may also be interested in using and/or contributing to the NatureMapr citizen science platform and database. Over the last couple of years its coverage, from the original ACT and NSW southern tablelands region, has been rolled out Australia wide. FOG has a direct connection here as some of our members contribute to this in various ways including as founder members and current administrators, expert moderators, and members providing sightings. NatureMapr provides the ability for anyone, via web or smartphone, to quickly upload native and introduced fauna and flora sightings (photo images and/or audio) from across Australia and shortly thereafter receive expert identification. Survey data can also be bulk uploaded. All expert moderator verified sightings, including any subsequent updates, are regularly exported to the Atlas of Living Australia. More members and local expert moderators are needed, particularly beyond the original Canberra Nature Map (CNM) region.NatureMapr has recently turned on its machine learning based moderator, known as Carbon AI (Artificial Intelligence), to significantly assist with the speed and quantity of identifications, and ultimately to free up the expert human moderator experts to focus on the trickier IDs. It is undergoing live testing and is initially being trained to identify more common species. The human moderators have the final say and can disagree with its advice, which in turn trains the AI to become smarter over time. More background and explanatory information on all the above can be found under the dropdown menus on the NatureMapr homepage and on the home pages of the various state and Territory region maps.

Observe, Think, Design, and Implement.

Seasonal Workshop series – Upper Campaspe Landcare Network & Thriving Rural
A well thought through property in Trentham © McQueen

Workshop One – Observation

Autumn: 30 April 2023

The modern outlook on life, including land management, insists that a lot of hard work and ‘doing’ is required to achieve our ambitions. But there is a lot that can be missed in our rush to the finish line.

In this workshop, we learn about the power of observation and some skills and tools that will help us notice the rhythms and systems of the land of which we have stewardship.

By understanding these rhythms, we can start to see how we can work with the land to create a place that fosters farm productivity, ecosystem health and personal wellbeing.

Workshop Two – Think

Winter: 25 June 2023

Observation gives us much to contemplate.

Taking the time to think through what we have learned about our properties through the practice of observation–details of the wind, the water, the animals, the plants, the solar access, the soil, the wildlife, the aspect, amongst many other things-ideas, innovations and solutions often become apparent.

This workshop will talk about systems thinking and how you can use it as a tool to organise your observations, learnings and thoughts to inform decision making and continuous improvement for your property, land management, farming business (and/or life in general).

Workshop Three – Design

Spring: 24 September 2023

Through the practice of observation and the development of skills in systems thinking to order and analyse our observations, we are now well equipped for the Design phase of our land management journey.

Over a 30year agricultural career, our Workshop Guide, Annemaree, has seen a lot of farms and rural properties. She has observed some commonalities between the best of them, but none are the same. They are all reflections of the landscape they are a part of and the people that work them.

There are some fabulous ideas and guidance to take inspiration from, but the thing is – what works for everyone else may not work for you, your property, your animals or your vision. Freeing ourselves from the expectations of others and what you ‘should’ do can be very liberating and can lead to some amazing innovations which work for you, making your life and property better.

Good design that is well implemented can make significant difference to land management, biodiversity and environmental outcomes, as well as farm productivity, profitability, and animal and human welfare.

Workshop Four – Implement

Summer: 17 December 2023

Now we have a plan!

But how do we go from plan to reality? There are many challenges in the doing, and as the saying goes – forewarned is forearmed.

This final workshop talks about the doing – stakeholder and neighbour engagement, regulatory frameworks and barriers, working with Council, DIY vs managing trades, funding opportunities, collaboration, budgets, and – especially important for Annemaree, and I suspect many other people – learning patience and enjoying the process.

These workshops will be delivered across the Upper Campaspe Catchment. Please contact the UCLN Landcare Facilitator, Rebekah at ucln@uppercapaspelandcare.org.au or on 0432 491 789 to reserve your place. Workshop locations will be provided on booking. Given the personalised nature of these workshops, places are limited to 15 properties for this round, so please, get in quick!

Workshop Guide: Annemaree Docking – Thriving Rural

Annemaree is a passionate advocate for looking at different ways of managing land use including designing and facilitating the implementation of contemporary regenerative models of farm planning, agribusiness, sustainability, and economic development.

Annemaree’s career history shows the depth and breadth of experience she has had across industries with strong, well-established links in the business, farming, food and tourism sectors. In addition to this, she has over 20 years’ experience in the livestock, horse (racing and equestrian), horticultural and viticultural industries and 10 years State and Local Government experience in Economic Development, Agriculture and Sustainability initiatives.

Annemaree is a mixed enterprise farmer, marketing produce both online and at Farmers Markets, and is actively involved in her community of local producers and consumers.

Annemaree is experienced in the successful delivery of land management and farming solutions using an innovative, holistic, systems thinking approach to problem solving and program development. As a leader and educator, she designs and delivers best practice programs to raise awareness, offer insights and facilitate behaviour change through the workplace and in the community.

On top of all this, Annemaree is currently a PhD candidate (commenced 2019) studying Regenerative Agriculture Systems and Sustainable Regional Development with Deakin University’s Centre for Regional and Rural Futures.